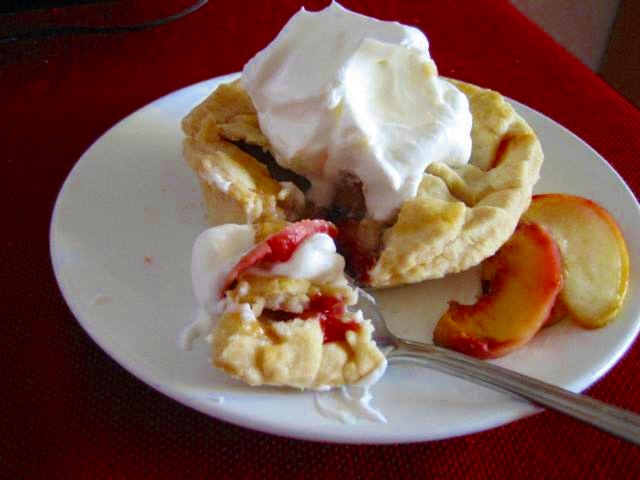
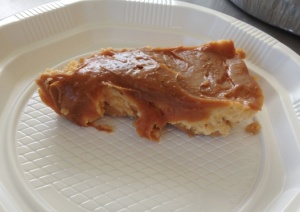
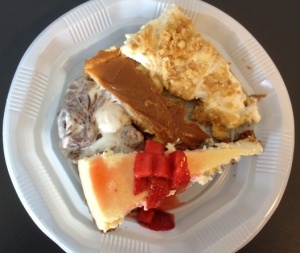
Apple Pie and Salted Caramel Hamantashen

It’s that time of year again! That time when kids set off fireworks non-stop, that time when every girl is a princess and every boy is a ninja, that time when something cool and awesome better make its way to me wrapped up in a bow. That’s right! It’s my birthday! Oh yeah, and Purim, that too. I guess that’s what everyone else is celebrating. Me? I have my priorities.
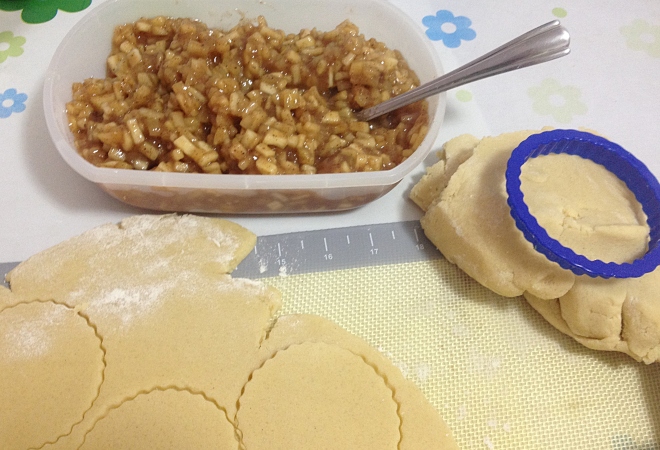
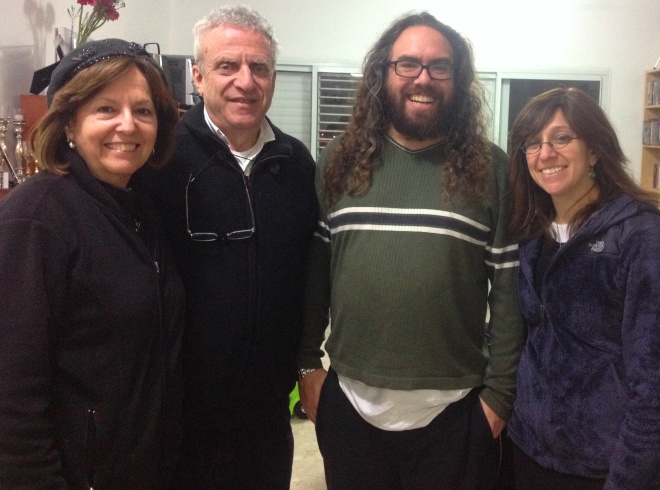
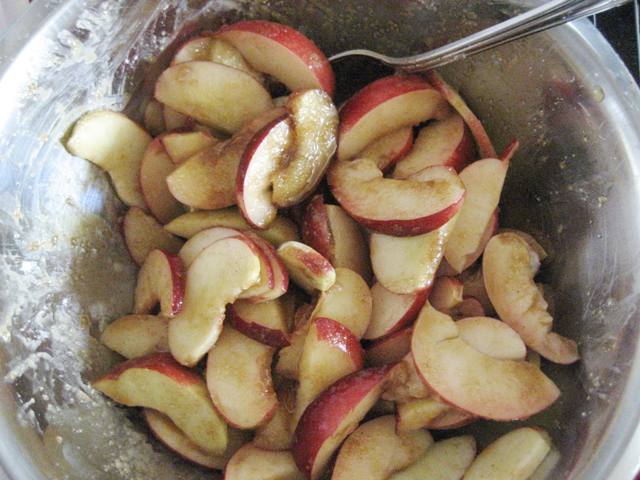
The cast of characters.

It’s the time of year when we can get most creative with our religious food – hamantashen for the masses y’all! In previous years I have made lemon meringue hamantashen which were a big hit. I have also made your run of the mill jam-filled hamantashen – Rocker Dude will not have Purim without them. And last year I tried a brownie-speculoos version – needed work so when I have it down I will post it here. But this year we are doing something a little different. We are combining two of my favorite foods – apple pie and hamantashen.
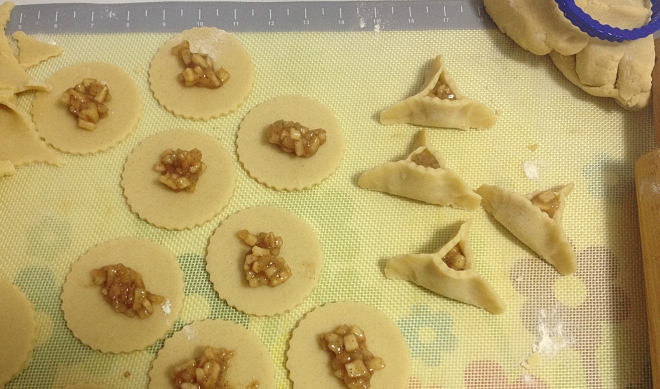
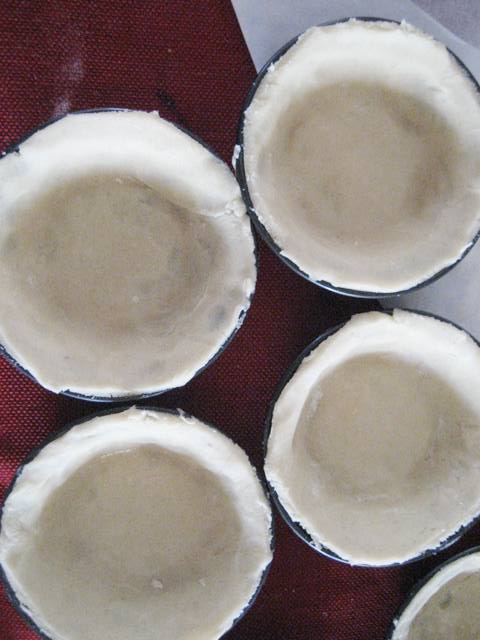
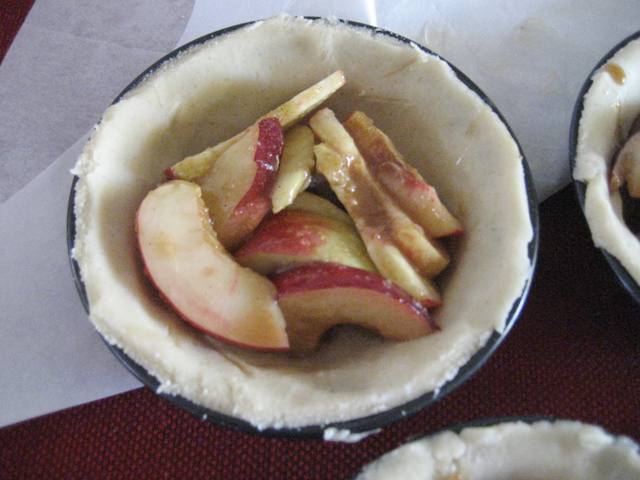
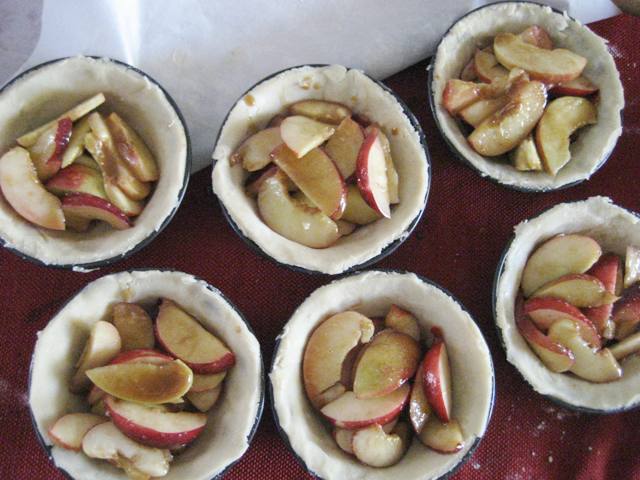
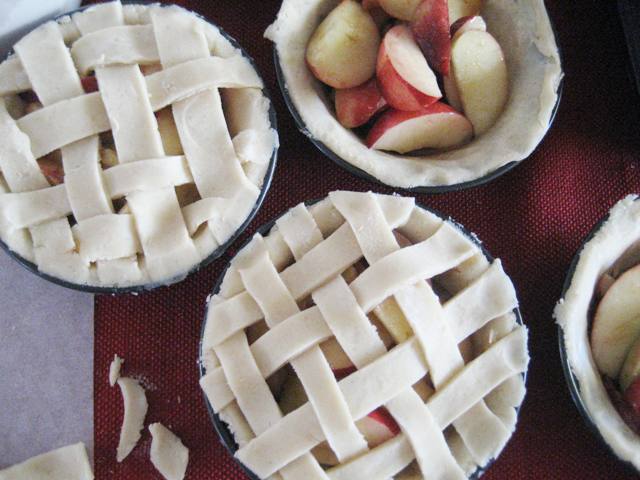
The process.
The process.

At first it may seem like an obvious pairing, delicious fillings in dough always are, and yet, it’s not too common. And just to dress it up, caramel shards on top.
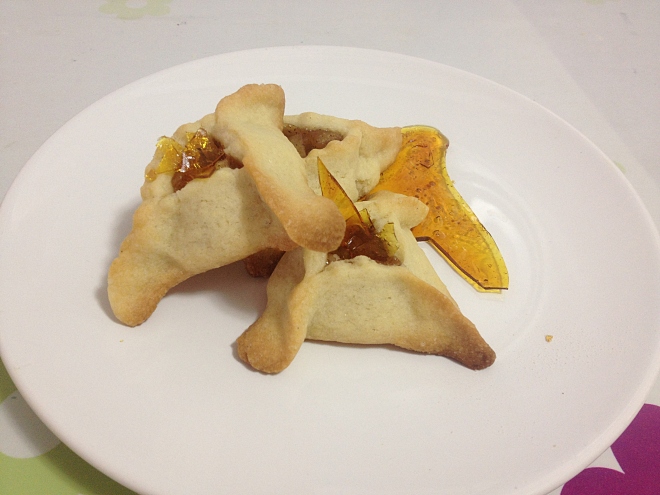
Apple Pie and Salted Caramel Hamantashen

I am always looking for something different to do with my hamantashen and while I know that tradition has its place, so does deliciousness. So let the baking begin! (Pesach is in a little over a month and here I am bulk buying flour for Purim – #ridiculoustiming – but there you have it. We have to have cinnamon rolls for mishloach manot!)
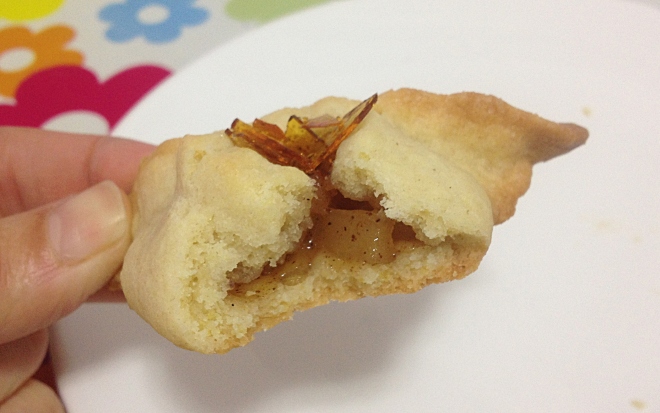
Nom nom nom nom.
Nom nom nom nom.

For the first time ever, we decided (read: I agreed) to dress up for Purim as a family, with themed costumes and everything. But not for us some Disney Princess with the rest of us as supporting characters, no, we do it properly. Superheroes all the way. The Little Rocker will be defending the city as Batgirl, with Squeaker as her loyal sidekick Robin from Rocker Dude and I as The Joker and Harley Quinn. It took a bit of planning but we got the costumes together and we are all set. I don’t know if we will do this every year, but it is fun to do once in a while. Also as Purim falls out on my birthday this year, we have to do something special. (Pictures to come soon!)

Recipe:

Cookie:
I used a double batch of this recipe from our sugar cookie adventures in December

Filling (based on this recipe from King Arthur):
3 cups peeled, cored, finely chopped apples – I prefer Gala, Pink Crispy or Pink Lady
2 tablespoons lemon juice
1/3 cup sugar
3/4 tablespoons flour
1 tablespoons cornstarch
1/4 teaspoon salt
3/4 teaspoon cinnamon
1/4 teaspoon nutmeg
1/4 teaspoon allspice
1/4 cup apple juice concentrate

Caramel Shards (based on this recipe from Epicurious):
1 cups sugar
1/4 cup water
1 1/2 tsp. salt

Make your filling first. You can make it a few days in advance and leave it in the fridge until you are ready to make your cookies. Mix all of the ingredients and stir until the filling begins to bubble and thickens considerably. You want to make sure that the filling bubbles so that you don’t taste the flour afterwards. Continue cooking until the apples reach your desired tenderness. It’s nice to have a little crunch still in the apples for texture. Set aside and cool. You can refrigerate for up to four days.

Follow the directions to make the sugar cookie dough until the refrigeration stage. You can keep the dough for a week in the fridge and for two months in the freezer.

When you are ready to make your cookies, preheat the oven to 350 degrees F and roll out the cookie dough to a 1/8 inch thickness. Using a drinking glass or a circle cookie cutter, cut out as many circles as you can. Place 1 tsp. of filling in the center of each one. Pinch each side together to make a triangle. (See here for instructions). Place cookies two inches apart on a baking sheet. Bake for 15-20 minutes, until the cookies are very lightly browned. Let cool.

To make the caramel shards, lightly oil a 12-inch square of foil. In a heavy saucepan boil sugar, water and salt over moderate heat, stirring, until sugar is dissolved. Boil syrup without stirring, washing down sugar crystals on side of pan with a brush dipped in cold water, until pale golden. Continue cooking syrup without stirring, swirling pan, until deep golden. Immediately pour caramel onto foil and cool completely, about 20 minutes. Break caramel into shards. Place a few small pieces into the center of the cooled hamantashen. Serve immediately or soon after. (Shards keep, layered between sheets of wax paper, in an airtight container at room temperature for 1 day.)

These are best served slightly warm – like real apple pie, but are also good at room temperature.

Makes about 4 dozen cookies.
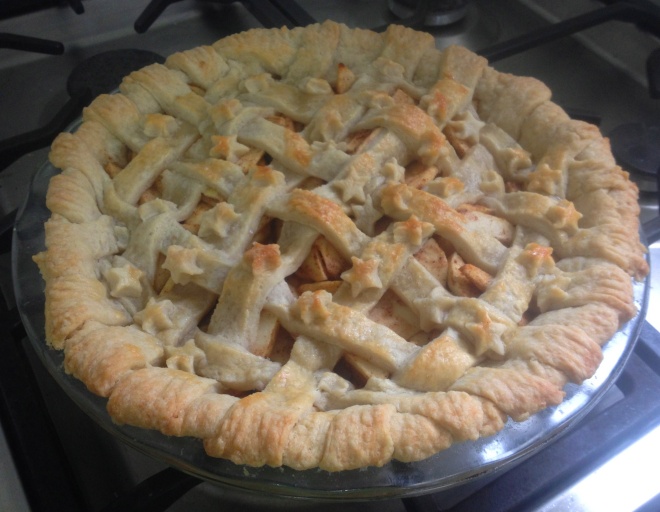
 

Starry Apple Pie

It is now actually cold. Winter has set in, at least for the week. It was actually cold enough to warrant turning on the heat. We’ll see how long it lasts. In the meantime, it is perfect for enjoying the winter desserts that we all love. Rocker Dude asked for Apple Pie, with whipped cream. So though it had been a while, I pulled out my trusty dusty apple pie recipe and whipped up a nice comforting pie.

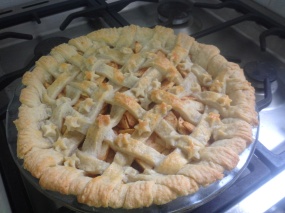
Starry Apple Pie
Starry Apple Pie

I have been making this pie for years. It’s a combination of a few recipes and it always comes out awesome. The filling has a little spice and the apples are not mushy and the crust is so delicious.

I have always used my standard 9 inch Pyrex pie plate to make all my pies, but last summer I treated myself to a deep dish pie plate with a fluted rim. This has made such a difference to my pies. The filling/crust ratio now feels more balanced, the rim holds the crust edge much better and overall, the pies come out more aesthetically pleasing.
I had filled the pie and was rolling out the top crust when I decided to make a lattice top instead of a solid top. With the extra dough, the Little Rocker and I cut out little stars to stick on top of the pie crust.

It looked great – the Little Rocker is really good at scattering the stars ;).

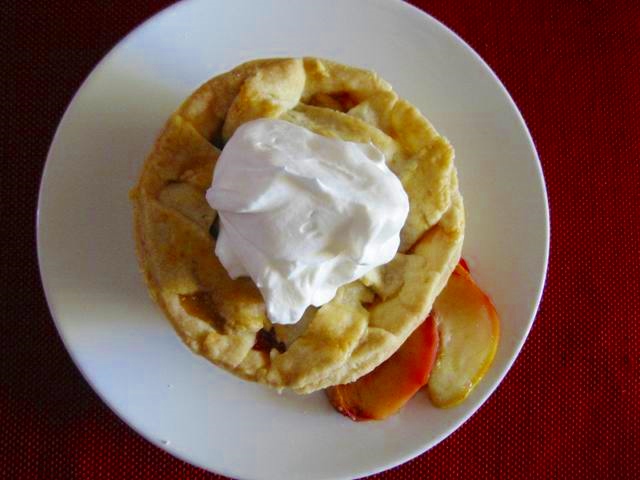
I added vanilla bean paste to the whipped cream so it made quite a treat when served – warmed, spiced apple pie with a pile of vanilla whipped cream on top. Perfect winter dessert.

The original Rocker Dude Family

In other news, we were witness to a lightning visit made by Rocker Dude’s sister and her youngest kid. They came to Israel for a week and we had to make the most of it. She came for the weekend as did the grandparents and we all had a great time – complete with trips to the emergency room. (What kind of trip would it be without one?)

A nice picture
A nice picture
Rocker Dude and his sister - their true selves.
Rocker Dude and his sister – their true selves.
You would think that because the Little Rocker went through all the effort of helping me with making the pie that she might actually eat it, but no. When dessert came, all she wanted was some whipped cream :). You win some, you lose some.
Apple Pie
Apple Pie

Recipe:
I used a double recipe of this pie crust recipe.

Filling:
6 medium apples, peeled, cored and sliced, I like to use Gala, Fuji, Pink Crispy, or Granny Smith apples
1/4-1/2 cup sugar (depends on the sweetness of the apples)
1/2 tsp. cinnamon
1/4 tsp. nutmeg
1/4 tsp. allspice
2 tsp. cornstarch
1/2 tsp. salt
1 tbsp. lemon juice
1 egg white

Whipped Cream:
1 250 mL pareve whipped topping or heavy cream
1 tsp. vanilla extract or vanilla bean paste

Mix all ingredients for the filling together, except the egg white, and set aside.
Preheat oven to 375 degrees F.
Roll out half of the dough after it has chilled and line a 9 inch pie plate, leaving a 1 inch overhang.
Place pie plate in the refrigerator and roll out the top crust.
Brush the bottom crust with egg white and pour in the filling, including all the juices. Lay the top crust over the filling and crimp the edges. Alternatively you can cut the top crust into thin strips and weave a lattice over the filling. If you have a solid top, make sure to cut some vents to allow steam to escape.
Brush the crust with egg white. Stay away from the edge as it will brown faster on its own.
If you have extra dough after you crimp the edges, feel free to cut out shapes to place on top of the crust. Brush the shapes with egg white. You can sprinkle some sugar over the top if you want.
Bake for 40 minutes, or until the filling bubbles. If the crust browns before the filling is done, tent the pie with some tin foil.
While the pie is baking, whip your whipped cream ingredients together until fluffy.
Let the pie cool for at least an hour before eating.

Baking with the Girlies

Every once in a while it’s fun to bake with the kids. I say once in a while because if I had to do it all the time, my kitchen would be a mess and nothing would ever get baked. But it was Chanukah and after our trip up north, I decided that it was finally time to take the plunge and bake cookies with the Little Rocker (now 6) and Squeaker (who should probably be renamed the Independent Minded Troublemaker but I wouldn’t want to give her a label 😉 ).

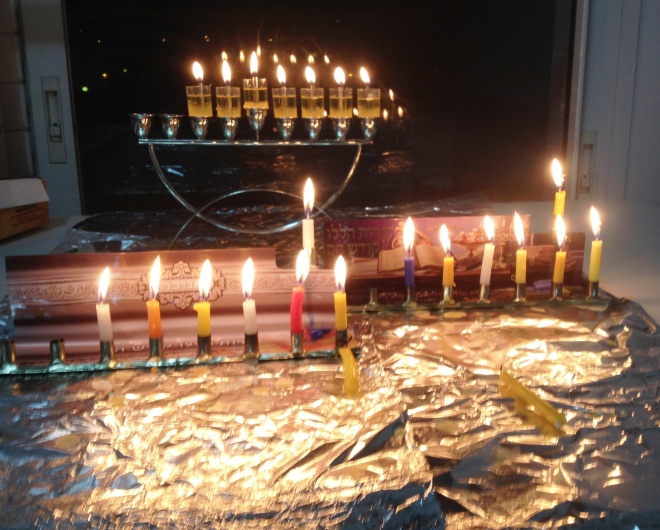
6th night of Chanukah

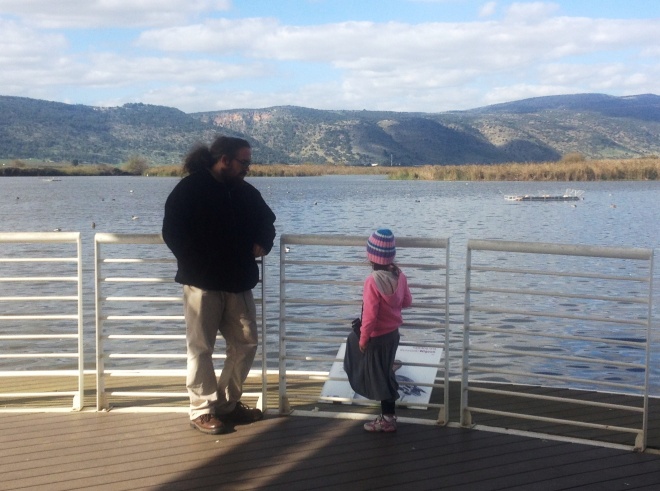
We had left early in the morning to go to the Hula Valley. It’s about a 2 hour car ride, but no traffic all the way :). Squeaker has been in a bit of a bird craze, where every site of a bird sparks an insistent “Birlie birlie!!” Conveniently, we pass a park every morning where an old lady brings bread scraps for the pigeons and we get to watch the birds eat bread every morning. Always an exciting moment.

Squeaker Looks Out
Squeaker Looks Out
The ladies enjoy.
The ladies enjoy.

The Little Rocker has been learning about the fall/winter in science class, and one of the major topics that kids learn about in Israel is the migration of the birds. They focus a lot on the Hula Nature Reserve and the kinds of birds that migrate through there every season. So it seemed like the perfect opportunity to take a trip.

Rocker Dude teaches the Little Rocker

The trip was a success, Squeaker was in an absolute “birlie-birlie” frenzy and the Little Rocker got to use her new binoculars that she received as a Chanukah present from the grandparents and Rocker Dude got to drive a golf cart – so fun all around!

Practicing with her new binoculars.

When we got home, I decided that after such a fun day, I had the patience to make sugar cookies – complete with sprinkles (no icing, let’s not get ahead of ourselves). Also all the Christmas cookie pictures were making me envious.

You can kind of see the flocks of cranes behind the family.

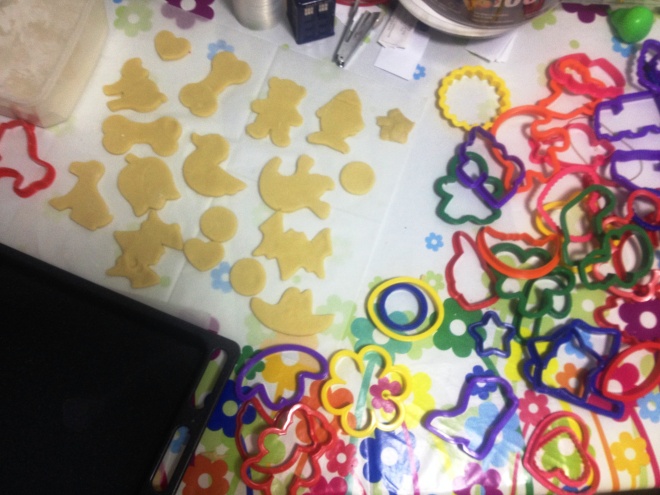
I had made the sugar cookie dough a few days before and it was sitting in the fridge just waiting for us. I pulled out my box of 100 cookie cutters and set the girls to work picking out which ones they would use.

After cutting out the first batch the girls got to the sprinkles, which may have been a mistake.  All of a sudden I noticed that instead of putting colored sugar on the cookies, Squeaker was just putting it in her mouth.  Let’s just say that bedtime was rough that night and complete with a lot of jumping on the bed. So after the first batch, complete with sprinkles all over the floor, I decided that the girls had enough of sprinkles and the second batch was left plain. Patience only goes so far.

Cookies galore!
Cookies galore!

The cookies came out perfectly.  They kept their shape wonderfully and the flavor was just right. The girls could not get enough of them. The Little Rocker wanted to bring in the whole batch for her classmates. That wasn’t going to happen – I wanted cookies too!

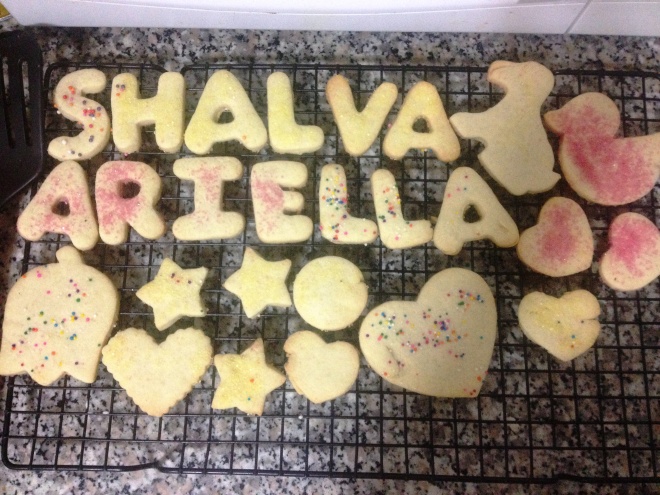
The end result.
The end result.

By the time dinner and bath time were over, we had two batches of letters, dogs, bats, flowers and bone cookies to eat for dessert. Yum!

Recipe (From Martha Stewart):
2 cups flour
1/2 tsp. baking powder
1/4 tsp. salt
1/2 cup (1 stick) butter or margarine
1 cup sugar
1 large egg
1 tsp. vanilla extract

In large bowl, whisk flour, baking powder, and salt. With an electric mixer, cream butter and sugar until light and fluffy. Beat in egg and vanilla. With mixer on low, gradually add flour mixture; beat until combined. Divide dough in half; flatten into disks. Wrap each in plastic; and refrigerate for at least 2 hours, or up to a week. The dough keeps well in the freezer for up to three months.

Preheat oven to 325 degrees F. Line baking sheets with parchment. Remove one dough disk; let stand 5 to 10 minutes. Roll out 1/8 inch thick, dusting dough with flour as needed. Cut shapes with cookie cutters and transfer to prepared baking sheets. Repeat with remaining dough.

Bake, rotating halfway through, until edges are golden, 10 to 18 minutes (depending on size). Cool completely on wire racks. Decorate as desired.

Eclairs with Vanilla Pastry Cream

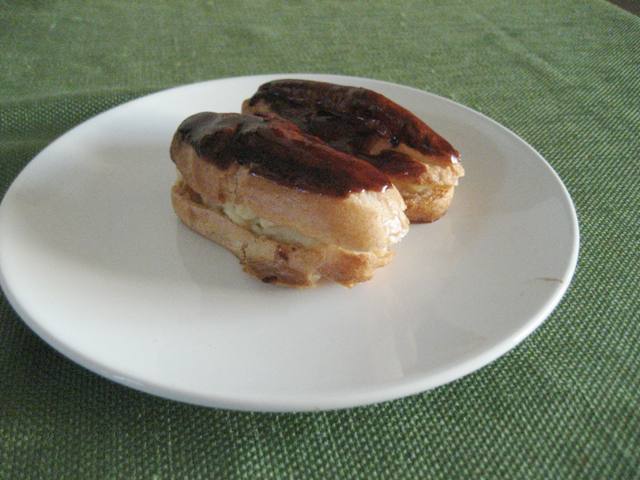
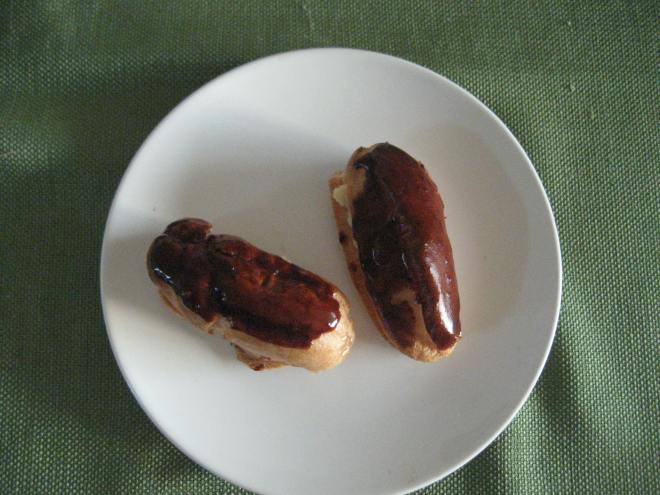
The last time that I made choux (pronounced like shoe) pastry, was when I made a croquembouche for Shavuot a couple of years ago. It was a little bit involved as you had to make the cream puffs, the cream, dip them in chocolate or caramel and then stack them up carefully.  It came out tasty, but I felt that the cream puff shells were not crispy enough, probably because I had filled them and stacked them the day before we ate the croquembouche. (Just as an aside, Rocker Dude thinks that the word corquembouche is too pretentious, so he calls is a crokey douche and that is what we really call it in our household. He also uses it as an example of a fancy dessert).Chocolate Glazed Eclairs

We were invited out to E. and A.’s for lunch this weekend, and when I asked E. what I should bring, she told me that she had just read the post about the Chocolate Silk Pie and would please like something decadent. But after indulging in the Chocolate Silk Pie, I was chocolated out.  I needed something different. So I browsed around on Pinterest for other decadent desserts. Someone pinned a picture of an eclair pie and that started the eclair mindset.

I did a little research on different recipes and different fillings and came the Joy of Baking site. The site is wonderful and has a lot of instructional videos that show all the steps of a recipe so you can make sure that what you are making looks like it should.  I watched the video for the eclairs, and though there were a few steps, it seemed relatively simple and straightforward.

Eclairs
Eclairs

i decided to make the pastry shells and the pastry cream and chocolate glaze on Friday, but only fill the eclairs on Saturday. That way they would not get soggy.  The Little Rocker asked me if she could please help me and as I couldn’t refuse such a request, I told her that she needed to watch the video on the Joy of Baking site and tell me what to do. It worked out wonderfully. The Little Rocker updated me every few seconds with what was going on, though she didn’t allow for time lapses when the video cut to the next step while I was still mixing. We had to pause a few times :). Squeaker cooperated by sleeping and not needing to be held – and that is even more helpful than the Little Rocker wanting to mix the batter!

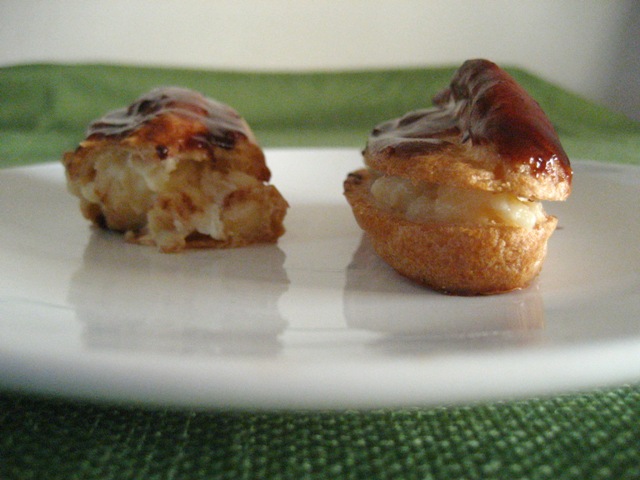
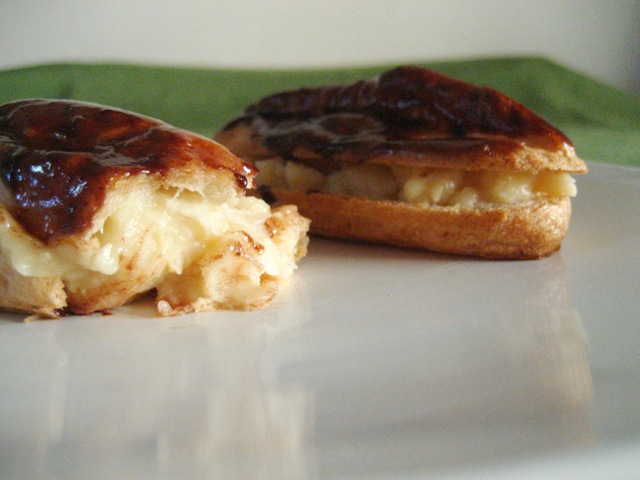
The shells baked up really nicely – nice and crispy on the outside and almost hollow on the inside. When they were cool I cut them in half and then dipped the tops in the chocolate glaze. I decided not to poke holes in the sides and force the cream in because as this was my first time making them and I was making them for friends, I didn’t want to take a chance that the filling would not fill the whole eclair and just settle on the side.

A bite of eclair
A bite of eclair

I felt that the glaze on the site was too thin.  Adding corn syrup and vanilla I think was unnecessary and made the glaze harder to deal with. Next time I make these, I will use a regular ganache that will harden a bit. I had to keep these refrigerated in order to keep them from being sticky.

Eclairs with Vanilla Cream Filling

My plan for keeping the shells nice and crispy worked! I filled them shortly before lunch and then refrigerated the finished eclairs until dessert time. Success!

FYI I am submitting this post to Aspiring Bakers #34: Choux Party (August 2013) hosted by Jasline of Foodie Baker.

Recipe (based on the Joy of Baking):

Choux Pastry:1/2 cup (65 grams) all purpose flour
1/2 teaspoon white sugar
1/4 teaspoon salt
4 tablespoons (55 grams) unsalted butter/margarine, cut into pieces
1/2 cup (120 ml) water
2 large eggs, lightly beaten

Glaze (optional):
1 large egg, lightly beaten

Pastry Cream:
1 1/4 cups (300 ml) whole milk/soy milk
3 large egg yolks
1/4 cup (50 grams) white sugar
2 tablespoons (20 grams) all-purpose flour
2 scant tablespoons (15 grams) cornstarch
1 teaspoon pure vanilla extract

Chocolate Glaze:
2 ounces (55 grams) semi sweet chocolate, finely chopped
1/4 cup (60 ml) heavy/whipping cream

Preheat oven to 400 degrees F (200 degrees C) and place rack in center of oven. To make all the eclairs the same size, you can use a template. Take a piece of parchment paper and draw 12 – 3 1/2 inch (8.5 cm) lines, spacing the lines about 2 – 3 inches (5 – 7 cm) apart. Place the template under your parchment paper so you can use it as a guide.

In a bowl whisk the flour with the sugar and salt. Place the butter and water in a saucepan over medium high heat and bring to a boil. Remove from heat and add the flour mixture all at once, and stir until combined. Return saucepan to the heat and stir constantly until the dough comes away from the sides of the pan and forms a thick smooth ball (about 1-2 minutes). Transfer the dough to your electric mixer (can do this by hand or with a hand mixer), and beat on low speed to release the steam from the dough (about 1 minute). Once the dough is lukewarm start adding the lightly beaten eggs (dough will separate and then come together) and continue to mix until you have a smooth thick paste (dough will fall from a spoon in a thick ribbon). Place the dough in a pastry bag fitted with a large plain tip and pipe 12 oblongs of dough (about 3/4 inch (2 cm) wide) onto the baking sheet (using template as a guide). If desired, with a pastry brush, gently brush the tops of the dough with a lightly beaten egg.

Bake for 15 minutes and then reduce the oven temperature to 350 degrees F (180 degrees C). Continue to bake for a further 25 minutes or until the shells are a nice amber color and when split, are almost dry inside. Remove from oven and place on a wire rack to cool. If they are not dry inside then poke two holes on the bottom of each eclair with a toothpick or a skewer. Turn off the oven and let the eclairs cool in the oven with the door slightly ajar. This will help dry them out inside.

In a heatproof bowl, mix the sugar and egg yolks together. Whisk the flour with the cornstarch and then add to the egg mixture, mixing until you get a smooth paste.

Meanwhile, in a saucepan bring the milk just to a boil (just until milk starts to foam up.) Remove from heat and add slowly to egg mixture, whisking constantly to prevent curdling. (If you did get a little curdling, then pour the mixture through a strainer.) Then pour the egg mixture into a medium saucepan and cook over medium heat until boiling, whisking constantly. When it boils, keep whisking constantly for another 30 – 60 seconds until the pastry cream becomes thick. Remove from heat and stir in vanilla extract. (For a chocolate pastry cream stir in 2 ounces (55 grams) finely chopped semi sweet chocolate. For a mocha flavor add 1 1/2 teaspoons instant coffee or espresso powder to the hot milk.) Pour the pastry cream into a clean bowl and immediately cover the surface with plastic wrap to prevent a crust from forming. Cool to room temperature then refrigerate until firm (can be made up to 3 days ahead). Whisk or stir before using to get rid of any lumps that may have formed.

Place the chocolate in a heatproof bowl. Heat the cream just until boiling and immediately pour it over the chocolate. Gently stir until the chocolate has melted.

Split the pastry shells in half, lengthwise. Take the top shell and dip into the chocolate glaze, letting the excess drip off. Place on a wire rack to dry. Fill the bottom half (can spoon or pipe) with the cream. Once the glaze is dry, gently place the top half of the pastry shell on the cream. Can be covered and stored in the refrigerator for two days.

Chocolate….Silk Pie

And now for something a little different. No stone fruit this week. This week is all about chocolate. Smooth and silky and rich chocolate.

Creamy chocolate.
Creamy chocolate.

For the past few weeks I have been really enjoying the peach season. Unfortunately, the cherry crop this year was not so successful so I am having trouble letting myself buy a tiny container of cherries for an exorbitant amount of money. It’s just not happening this year. Hopefully next year there will be a better crop and I can add some variety to the stone fruit season. Even apricots seemed to have an unusually short season this year. They were in stores for about a month, maybe less. I feel like I turned around and they were gone. So I apologize for the lack of apricot recipes as well.Chocolate Silk Pie

But enough of fruit. I know what you all really love, chocolate! And to think that when I was a kid I hated chocolate.  Apparently I just never had any well-made chocolate desserts until I was an adult. When I was trying to decide what to make this week, I honestly felt at a loss. Actually it was more than that – there is a Hebrew expression – choser onim – which basically means helpless, but much more so – like you have no direction and you can’t see success anywhere. That was me. I had no idea what to make – for dinner, for dessert – nada. So I started with what I needed to use – the vegetables from our csa. Okay, pumpkin souffle. Done, Chicken… prepared bbq sauce. Done. Dessert… okay now we are stumped.  Fruit? Not really in the mood for making a pie crust. Chocolate? What about it? Just brownies or something fancier? On top of my indecision, I also had social events to plan around, first and foremost  was Rocker Dude’s premier as a singer!

Rocker Dude got involved in a Linkin Park tribute show and auditioned to rap for two of the songs – “Bleed it Out” and “Faint”. Not only that, but he started the show!! So I, as a supportive wife, had to go to the show in Tel Aviv on Thursday night (seriously putting a dent in my Thursday night prep time). It was great to hear Rocker Dude sing, and I am also a huge fan of Linkin Park in general and they played all of their older music so it was an enjoyable show all around. Go Rocker Dude!

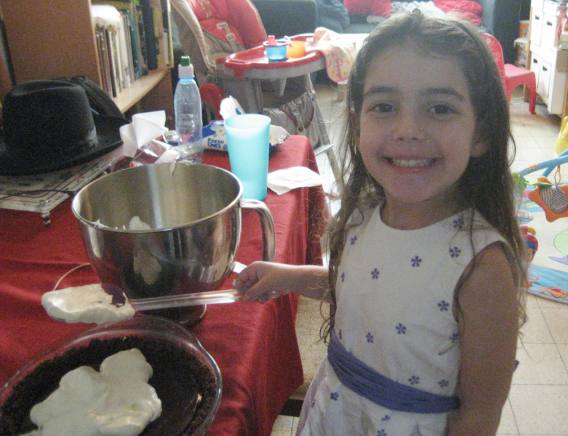
The Little Rocker adds whipped cream.

Back to our baking dilemma, on Thursday afternoon I went to a baking supply store to get vanilla extract (they have the quality stuff) and some high quality chocolate. (And I wanted to buy out the whole store.) I then stopped at the supermarket for a few more things, like figs. And that messed up the amorphous thoughts of dessert floating through my mind. Chocolate or figs?

In order to make help make my decision, I narrowed down the options. Rocker Dude has rules about when he helps me make decisions. First, I have to narrow down the options to the two or three options that I think are best. Then he will decide between what is left. So I gave him the options of Chocolate Silk Pie and Fig, Honey-Almond Tart. As he is a man of simple tastes (and figs are not one of them), you can imagine what he chose – the Chocolate Silk Pie. But he said that it shouldn’t be too chocolatey. Oy.

After licking the spatula.

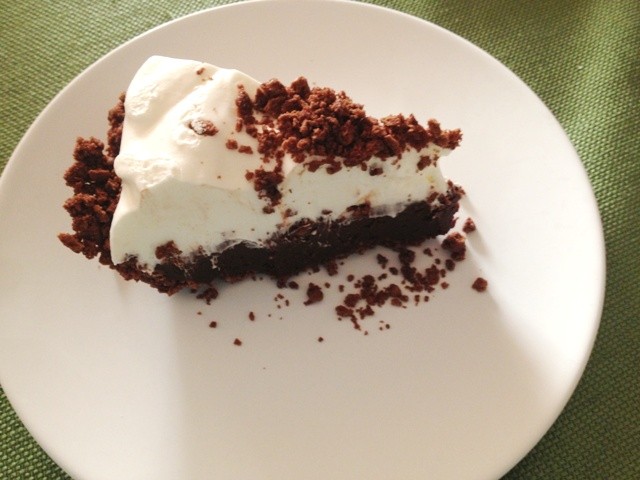
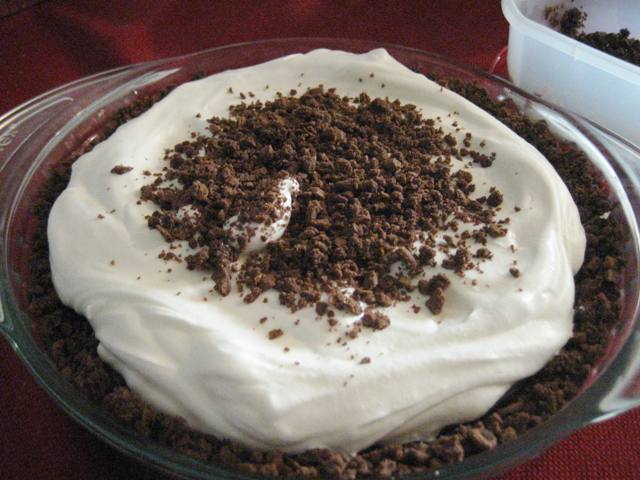
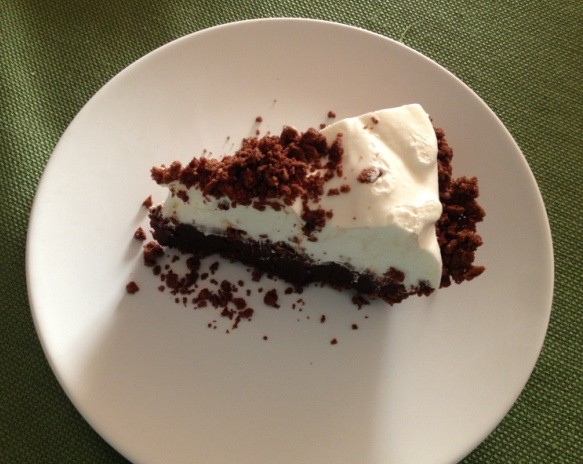
This pie is a rich, creamy dessert that really showcases the chocolate. With a chocolate cookie crust, a truffle filling and a whipped cream topping, it is decadence personified. Can a dessert be personified? Hmm.

This is  a multi-step dessert, involving pasteurizing eggs (no no one gets food poisoning or anything) and then chilling the chocolate filled pie and topping with whipped cream. This dessert is really rich and delicious and even for me – one piece is enough, but so worth it.

Chocolate Silk Pie
Chocolate Silk Pie

It is also a great summer dessert as the pie is nice and cool. Hopefully next week we will have the Fig Honey-Almond Tart. Rocker Dude will have to suffer with it then :).

Also, a sponsored announcement right now. On August 22nd, Rocker Dude is producing an amazing tribute rock concert: Rock4Rookies Live!!! He is celebrating 5 years of his podcast with a concert by some of Israel’s best rockers. So anyone who will be in Israel then should come to the show!! The link to the Facebook event is here. Now you all know why we call him Rocker Dude! And check out his show here.

Recipe (From The Art and Soul of Baking):

Crust:
7 oz. chocolate sandwich cookies
3/4 stick butter/margarine, melted

Filling:
3 large eggs
6 Tbsp. sugar
3/4 stick butter/margarine
10 oz. good quality bittersweet or a mix of bittersweet and semisweet chocolate (up to 70% cacao)
1/3 cup heavy cream
1 tsp. vanilla extract

Topping:
1 cup heavy cream
3 tbsp. confectioner’s sugar

Preheat oven to 350 degrees F.

Grind up the cookies in a food processor until you have fine crumbs.  Set aside about 1/4 of crumbs to top the pie. Mix the crumbs with the butter or margarine. Press the crumbs into the bottom of a pie plate and up the sides as well. Place the crust in the oven and bake for 10 minutes or until lightly browned.  Cool completely.

In a heat proof bowl, whisk the eggs and sugar together. In a saucepan, heat two inches of water. Reduce to simmer and place the bowl over the pot. Keep whisking the egg mixture together as you slowly heat it. Using an instant read thermometer, heat the egg mixture until it reaches 160 degrees F. Remove from heat and pour the mixture into the bowl of a stand mixer. If some of your eggs scrambled, pour the mixture through a sieve into the mixing bowl so that you don’t get egg clumps. Beat the eggs on high speed for three minutes.

While the eggs are beating, add the chocolate, cream and margarine to the bowl over the pot of boiling water. Let sit for a minute and then gently mix until the chocolate is completely melted. Remove from heat and slowly pour the chocolate mixture into the egg mixture while the mixer is still going at medium speed. Mix until there is no longer a trace of the eggs. Beat in the vanilla extract.

Pour the chocolate into the cooled crust and refrigerate for at least an hour.

To make the topping, beat the cream and confectioner’s sugar in a mixing bowl until you have soft peaks. You can pipe the cream decoratively over the chocolate or use a spatula. Sprinkle reserved cookie crumbs over the cream.

The pie will keep in the fridge for three days, though the cream might start to break down after the first day.

Nectarine Cardamom Vanilla Pie – for a Happy Birthday

Happy Birthday J.! To celebrate J. birthday, I was asked to make a fruit dessert.  Well hello peaches. Or nectarines. Or apricots.

Millions of peaches, peaches for me.

J. is kind of an old soul stuck in a young body. Or as he puts it, in an old body. What is it with men and feeling older than they are? Isn’t it better to feel young and spry? It’s a mental game people! J. is also a longtime fan of The Unappreciated Baker (thanks!) and a lover of all things fruity desserty. And so, for his birthday – fruit dessert! Coincidentally, I love fruit desserts as well :).

Nectarines!
Nectarines!

Going back to nectarines.  I like to bake with nectarines as opposed to peaches because then I don’t have to worry about peeling them.  While I don’t mind the fuzzy peach peel in my desserts, others do. So if I bake with them, I need to peel them.  Due to the special occasion, I broke out my mini pie plates so that everyone could enjoy their very own peach pie.

Pie crusts ready to be filled.

I thought about going with my tried and true pie recipe, but then I thought about changing it up a bit – after all, isn’t that the point of this blog? To try new things. I found a recipe that flavored the peaches with vanilla and cardamom, not a combination I have used before with peaches. Testing time!

One pie all filled up.

I did stick with my tried and true pie crust recipe, because, if it ain’t broke, don’t fix it. With my regular double crust recipe I had enough dough for eight crusts and seven lattices. One ended up being a snack on Friday afternoon :).

The Little Rocker and I snacked on the sample and we enjoyed it a lot.  She was a little disappointed that she did not get her own pie to sample, but I told her that at the party she would have her own so it was okay to share this time.

And the others follow.

On a related note, Squeaker just started eating solids and while she is not such a fan of the peas and sweet potatoes, she loves her some peaches. I mixed the peas and peaches and wham – at the whole bowl. Peach season for everyone!

The finished product.
Ready to be

I didn’t really feel the cardamom in the pie, maybe increase it next time?

And here we go!
And here we go!

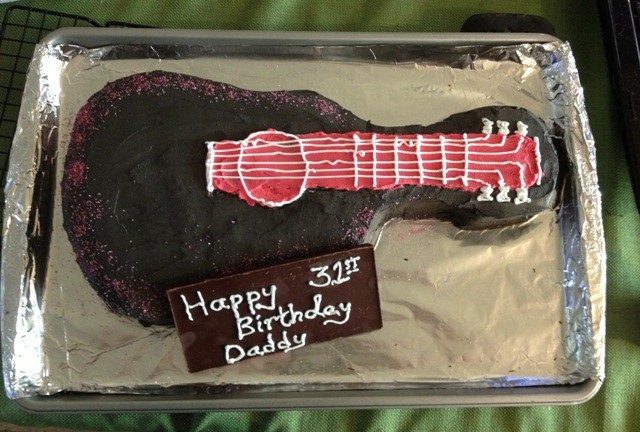
We know what J.’s birthday means – Rocker Dude’s birthday! Amazing how close friends can have their birthdays so close together. Rocker Dude asked for a plain sheet cake for his birthday – can you see what I am working with?? A plain yellow cake??? With icing!! I hate working with icing. I am not talented in that way – drawing was never my forte, and the icing is always so sweet. It is always the part of the cake that I take off so that I can eat the actual cake.

So here is the cake that I made. My friend M. was kind enough to lend me a guitar shaped cake pan so that I didn’t have to try and cut out a guitar shape from a rectangular pan. That would have been disastrous. The Little Rocker had such a fun time watching the cake take shape, especially putting in the food coloring. I didn’t make the icing that bright as I hate putting in more than a few drops of food coloring. It may be weird but if I do then I feel like I am coloring my insides.

Happy Birthday Rocker Dude!

I have included the recipe for the cake because I thought that the cake was delicious on its own – with a bright citrus flavor. It’s perfect for birthday cakes and cupcakes.

And speaking of summer (weren’t we?), there are a few things that are ubiquitous to summer – baseball and ice pops. Here is a picture of Squeaker in an NY Yankees outfit that we originally got for the Little Rocker.

Yankee Fans!
Yankee Fans!

My father is a lifelong Yankees fan and if there is one thing I learned as a kid, it was that you root for the Yankees, or you’re not a real Schachter. Lucky for me, Rocker Dude is not into sports so I don’t have to keep up with his favorite team stats and stuff.

And ice pops! The Little Rocker remembered this picture of her “eating” my ice pop when she was a year old or so, and so she asked me to do it with Squeaker as well.

Eating ice pops.
Eating ice pops.
Squeaker tries to eat an ice pop.

This time I just gave her a closed ice pop of her own, but she knew better. She still kept trying to grab my ice pop.

Nectarine Cardamom Vanilla Pie (makes 8 4-inch pies)

Recipe:
Crust:
A double crust recipe of this recipe, prepared through

Filling (based on this recipe from The Pastry Affair):
6 large (7 medium or 8 small) fresh peaches, peeled and sliced
1 tablespoon fresh lemon juice
1/4 cup (50 grams) brown sugar, packed
1 vanilla bean, halved with the seeds removed (or 1 teaspoon vanilla bean paste)
1/2 teaspoon ground cardamom
3 tablespoons cornstarch
1/4 teaspoon salt

1 egg white
2 tbsp. sugar for sprinkling

Whipped Cream:
250g whipping cream
1/4 cup confectioner’s sugar

Prepare the dough through the refrigeration stage.

Preheat the oven to 375 degrees F.

Combine all the ingredients for the filling and set aside while you roll out the dough. Roll out one disc of dough to a 1/8 inch thickness. You don’t want to leave the dough too thick as the pies are small. Cut out circles that are slightly larger than the circumference of the pie plates. Gently place each circle in the pie plates and trim the edges. Refrigerate the pie crusts as you make them to keep the dough cold. Then add filling into each of the pie plates and return to the refrigerator while you roll out the lattice top. Roll out the second disc to a 1/8 inch thickness. Slice into thin (about a finger’s width) strips with a very sharp knife or a pizza wheel. Carefully weave the lattice strips onto the tops of all the pies.

Brush egg white onto the tops of the pies and sprinkle with sugar. Place the pies in the oven and bake for 20-30 minutes, until the filling is bubbling. Let cool on a rack.

To serve, beat the whipping cream with the confectioner’s sugar and dollop a generous spoonful on top of each pie.

Yellow Cake (From The Kosher Palette):

3 cups flour
2 cups sugar
1 tbsp. baking powder
1/2 tsp. salt1 cup vegetable oil
1 cup orange juice
1 tsp. vanilla extract
4 large eggs

Preheat the oven to 325 degrees F. Grease a 9×13 inch pan.

Combine flour, sugar, baking powder and salt in the a large mixing bowl and stir until well blended.

In the bowl of a mixer, beat the oil, orange juice, eggs and vanilla. Beat until lightened in color. Add the dry ingredients in one shot and mix until just blended. Pour into prepared pan and bake for 45-50 minutes or until a toothpick inserted into the center comes out clean.

This cake also freezes well.


Peach Pie Crumble – Summer is here!

Millions of peaches, peaches for free. Millions of peaches, peaches for me. It’s stone fruit season! Woohoo!

Stone fruit season is the harbinger of summer.  Let me tell you, I didn’t need a peach to tell me that the temperatures were going up and that the sun has come for good and doesn’t plan on giving us a rest until November. When the laundry dried in under five hours, it was kind of a giveaway. Also, if you go outside and it feels like someone has a blow dryer blowing on you – also kind of a giveaway.  Though, I have to admit it is not unbearable yet. There are even some days when we don’t need to turn on the air conditioner. There is something about this weather that just calls out for a nice juicy peach.  That has to be the reason why they ripen just at this time of year.

Last week’s special was peach pie… with a crumble topping.  So peach crumble… in a pie crust. So peach pie crumble! (Actually I used nectarines, so Nectarine Pie Crumble if we want to get technical.) I was so excited to make the first stone fruit dessert of the season.  I got a whole bunch of peaches and nectarines and then I didn’t know what to do with them.  I spent Friday morning browsing through the cookbooks, thought about making peach dumplings, but wasn’t in the mood. I wanted to make a peach pie and I couldn’t find the recipe that I was “feeling”. Also, I didn’t have the energy to try and steal five minutes on the computer from Rocker Dude to browse online. In The Kosher Baker by Paula Shoyer I found a list of easy fruit pie fillings.  One was a peach pie. So this pie is inspired a bit from there, and a bit from what I had in the house.

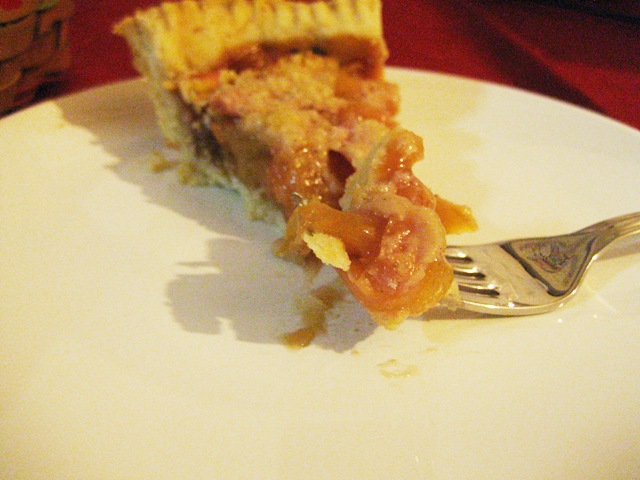
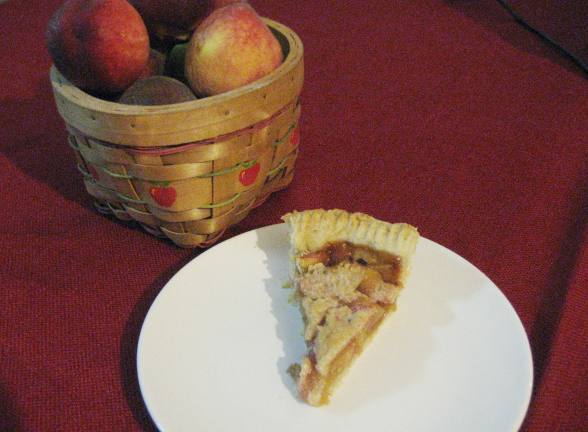
A slice of pie. Sorry for the poor lighting, it was late and there was only one piece of pie left. I didn't want to wait until morning when there would be no pie left.
A slice of pie. Sorry for the poor lighting, it was late and there was only one piece of pie left. I didn’t want to wait until morning when there would be no pie left.

The little bro came over for the weekend, and even though he is usually a fan of my baking, he decided to have babka for his dessert instead.  (Granted, I made that as well, but apparently he wasn’t feeling the pie thing.) I was very disappointed in him.  I guess if I had made a strawberry shortcake, he would have dug right in. At least this time, Rocker Dude liked the pie.  Which is interesting, because I used almond extract in the filling and he hates almonds and almond extract.  Don’t tell him that he liked something with almond in it – I have to win somewhere :).

Peach Pie Crumble
Peach Pie Crumble

I had some crumble topping in the freezer left over from an apple crumble that I made who-knows-when, and I am really attempting to clean up what is in the house and use what already exists before I go shopping for more. Ergo, use already made crumble topping on pie – great solution. I was worried that the crumble might get soggy in the peach juices but it totally stayed crunchy.  I recently read somewhere that in restaurants, in order to keep the crumble crunchy, they bake the fruit and crumble topping separately and then right before serving, they reheat the fruit with the crumble topping to make a cohesive dish.  Great trick!

I can’t wait to make more things with the new crop of peaches, nectarines and apricots! Stay tuned!

Recipe:

Crust:Half of this recipe, made until the chill step
1 egg white

Filling:
6-7 medium sized peaches, peeled, or nectarines, pitted and sliced
1/4 cup brown sugar
2 tbsp. corn starch
1/2 tsp. almond extract
1/4 tsp. salt
2 tsp. lemon juice

Topping:
1 stick butter or margarine
3/4 cup flour
1/2 cup brown sugar
1/4 tsp. salt

While your dough is chilling, mix together the ingredients for the filling. Let it macerate while you make the topping and roll out the dough.

Place all the topping ingredients into a bowl.  With a pastry cutter, or your hands, gently incorporate the butter/margarine into the dry ingredients until it is crumbly and holds together when you squeeze a bit in your hands.  Refrigerate until needed.

Preheat the oven to 400 degrees F.

Roll out the dough on a floured surface to about an 1/8 inch thickness.  Gently place in a 9 inch pie pan and crimp the edges decoratively. Using a pastry brush, brush egg white over the bottom of the crust to help prevent sogginess.  Then add the filling, mounding it slightly in the center. Generously sprinkle the crumble on top of the filling and place the pie into the oven.

Bake for 30-45 minutes depending on your oven, until the crust edges are slightly browned and the filling is bubbling. Let cool on a cooling rack. Serve with whipped cream or vanilla ice cream if desired.

The Saga of the Babka

The first time I ever made babka, I was in summer camp in the Catskills and we had a baking activity (because nice religious girls have to know how to bake for their husbands of course) and we learned how to make challah, chocolate cake and other traditional delicacies. One of the other things we learned was babka. Babka is a traditional Jewish yeast cake that is often served on Shabbat morning.

I used to make the babka recipe that I got from camp for a while, but it was a huge “patchke” (effort).  The recipe also called for over a whole pound of butter/margarine which is a bit much for me, and you had to let the dough rise for six or seven hours total which basically takes up a whole day.  Also, the recipe is on a paper inside the cover of one of my mom’s cookbooks, and not in Israel with me. I more or less forgot about it and that was that for many years. (That wasn’t much of a saga, was it? I guess in my mind, I added on all the years in between into the story.)

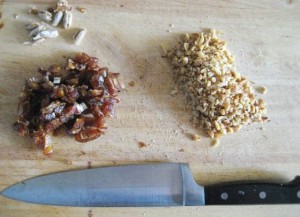
Chopped Walnuts
Chopped Walnuts

Last week was Shavuot and though the entire holiday is so dairy-centric, i was asked to make a non-dairy dessert for dinner.  I had no idea what to make.  Not even the slightest idea. So I pulled out one of my first cookbooks, The Perfect Cake, that was given to me by a classmate in high school. In high school I had a thing where I made a cake for everyone in my grade’s birthday.  We are not talking about fancy cakes here, but basic yellow cakes, maybe with chocolate chips or something. In twelfth grade, one of my classmates gave the book to me as a present but it has not gotten as much use as it should have.

Adding the dates.
Adding the dates.

So during my dessert decision making I pulled out this cookbook so that it wouldn’t feel lonely.  I was in the mood for a yeasted cake for some reason, and I had a package of yeast that needed to be used up before it expired. The Perfect Cake is basically a cookbook that provides basic recipes for various kinds of cakes – yeast, sponge, genoise, cheesecake, etc. and then a whole bunch of variations and flavorings. The recipe for the basic yeasted cake also came with a richer variation besides all the optional fillings. I went for the richer variation because I was worried that the dough might be dry, and as the cake was not going to be served with coffee, I wanted it on the moister side. What I most did not want was a recipe that would require more than two hours of total rising time because we had to leave to our friends’ by noon.  (We ended up being a bit late anyway as Rocker Dude had to paint the Little Rocker’s nails – fingers and toes! She wanted alternating pink and purple on her fingers and alternating green and blue on her toes.  It looked great!)

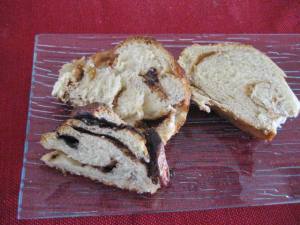
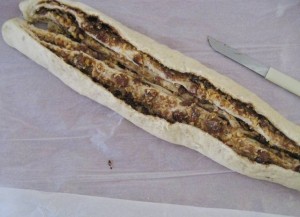
Cutting the roll to expose the filling.

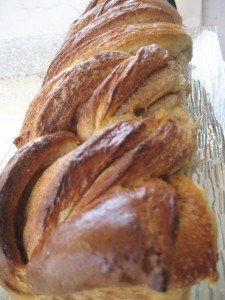
The dough was easy to mix up and did not have a whole pound of margarine, it rose really nicely and was easy to roll out.  The filling was another decision.  I like cinnamon babka best.  This hearkens back to the days when I did not like chocolate at all (what?!?!?) and I would not eat chocolate cakes or anything.  The only exception was Hershey’s and Reese’s.  Since then my tastes have matured somewhat and my father can again claim me as his daughter (He is a chocolate person.  One of his favorite ice creams is Death by Chocolate.) But for the babka I decided to go cinnamon anyway. I filled it the way I normally fill cinnamon buns, and rolled up the dough.  In retrospect, I should have used more filling because it was kind of lost in the dough.

One roll all done!
One loaf all done!

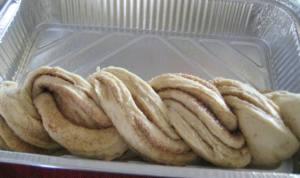
Instead of following the shaping instructions in the book, though, I followed the instructions on the back of the yeast package. I know, I am such a rebel. Basically, instead of just twisting two rolls together, I made one roll, and then cut it in half down the middle.  This gave me two half rolls of many layers.  Then I twisted these together and put them in the pan. I think it helps the filling get out and makes the cake a bit more appealing.

Two loaves ready to go.

After this cake working out, but the filling not making me happy, I made the dough again and tried different fillings.  I made a date nut filling for the Little Rocker’s friend’s birthday party, a brown sugar and cinnamon that is now in the freezer, and a chocolate (yes Abba, a chocolate) that has since been completely finished. I used a lot of margarine before putting on the fillings and that definitely helped make the cakes a bit gooey-er. Rocker Dude did not want to even try the date-nut babka as it had nuts, and he does not get nuts in food. He is just unclear why they have to be there in the first place. I loved it.  We had organic barhi dates that I had ordered a few weeks ago from our csa and they were super-sweet. That version was a success.  A bit messy, but a success.

All done
All done

I made the brown sugar one and I enjoyed that one a lot, so did Rocker Dude. A basic sweet dough with a sweet filling. The chocolate was an afterthought as after the two loaves I still had some extra dough.  I didn’t want to just take chocolate spread and use that as a filling because I thought it was kind of a cop-out, so I mixed cocoa and sugar (you know, so it would be sweet), and sprinkled that over the melted margarine. Rocker Dude asked to use for filling.  He said that there should be so much filling that he has to lick it off his fingers. He has a point.

Three kinds of babka - top right - brown sugar, bottom - chocolate, and top left- date-nut.
Three kinds of babka – top right – brown sugar, bottom – chocolate, and top left- date-nut.

While this is not a quick recipe, it is simple and just requires some rising time.

P.S. I just finished watching the first season of Nashville, and who knew that Hayden Panettiere could sing?? Also the two main characters keep doing the stupidest things – so frustrating!! Can’t wait for the next season :).

Recipe:

Dough:
1/2 cup warm water
1 tsp. sugar
1/2 oz. active dry yeast, or 25 grams fresh yeast
1/3 cup honey
1 tsp. salt
1 cup yogurt or soymilk with a little vinegar
2 eggs
1 tsp. grated lemon or orange zest
1 tsp. cinnamon
1/2 butter or margarine, melted and cooled to room temp.
4 to 6 cups all purpose flour

1/2 cup butter or margarine, melted

Egg Wash:
1 egg, beaten
1 tsp. water

In a large mixing bowl, combine the water, sugar and yeast. Let sit for five minutes until the mixture looks bubbly (if you are using fresh yeast, then you don’t have to wait). Add the other ingredients except for the flour. Whisk until blended.  Add in the flour, one cup at a time until the dough forms a soft ball. Turn the dough onto a floured work surface and knead by hand for a few minutes adding flour as needed to prevent sticking. When the dough feels smooth, place in a bowl and cover with plastic wrap.  Let rise in a warm place for 1 1/2 hours.

The dough can be refrigerated at this point overnight. Bring to room temperature before continuing with the recipe.

Preheat the oven to 350 degrees F. When the dough is finished rising, divide into three parts. Roll the first piece of dough out to 1/4 inch thickness.  Using a pastry brush, generously brush the dough with some melted butter. Sprinkle on the desired filling (recipes below). Roll up the dough lengthwise into a tight roll. Slice the roll down the middle with a sharp knife. Twist the two halves together, with the cut sides facing out. Place in a 9×5 inch loaf pan or in a 9×13 inch pan (with room for another one). Brush with egg wash.

Let rise again for forty minutes or so, until not quite doubled in bulk. Bake for 30 minutes or until the cake sounds hollow when you tap on it. Cool on a wire rack.

Fillings:

Chocolate Filling:1/4 cup cocoa
1/2 cup sugar

Brown Sugar and Cinnamon Filling:
1/2 cup brown sugar
1 tbsp. cinnamon

Date-Nut Filling:1/2 cup walnuts, finely chopped
8 dates (I used barhi dates), pitted and finely chopped

Brownie-Swirl Cheesecake

Hello again to all my friends, I’m glad you came to play. Our fun and learning never ends, here’s what we did today! (Bonus points to anyone who remembers that show from childhood.)

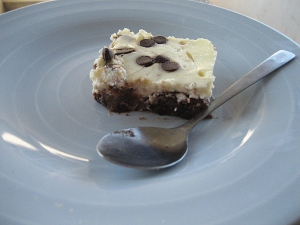
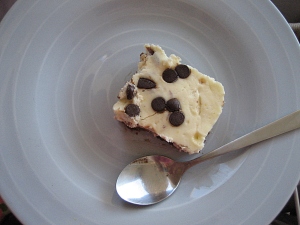
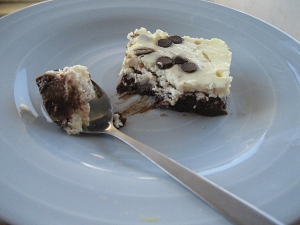
Well we are back with another cheesecake recipe.  Here is something for you chocolate lovers – brownie and cheesecake – together! Doesn’t get much better than that.  In this version, we have a brownie layer and a cheesecake layer which are then swirled together – somewhat – and then chocolate chips are sprinkled on top.  My version did not get so swirled as the brownie layer was much denser than the cheesecake layer (possibly because I used white cheese instead of cream cheese – but those are my limitations here). So it ended up more as a fudgy-brownie layer (the best kind) and a cheesecake layer.

Brownie Swirl Cheesecake

I have to say that it was really easy to make.  Only required one bowl (which I washed in the middle) and in the oven it went. I actually doubled the cheesecake part of it because I was making the cake in a 9×13 pan instead of an 8×8 as the recipe calls for. The recipe below is the original.

I was actually up to one am last night as one of my customers decided to have a conference call event at midnight Israel time, just to be sadistic, and I had to stay up for it.  So if I was going to need to stay up anyway, might as well accomplish something.  So I made this cheesecake to take to our friends at whom we will be staying for Shavuot, and a blueberry cheesecake for Rocker Dude, because it is his favorite.

Chocolate chips!
Chocolate chips!

Shavuot is kind of a crazy holiday because it is only one day long (or two outside of Israel) and there is so much preparation for it because everything has to be dairy.  Most people I know cook primarily meat for holidays, so everyone tries to get in all the fancy dairy food that they have always wanted to make and it sometimes makes for some really heavy meals. I planned on practicing restraint this year, but now we are going away for the holiday, so I don’t have to do anything but provide dessert.

Have a bite.
Have a bite.

Shavuot is when we celebrate receiving the Bible. As a result, one of the customs on Shavuot is to learn Torah all night.  Usually it’s the men who do it, but some women like to join in as well.  Once you have kids it is harder because those kids will be up at 6:30 in the morning, so you better be functional at that time of day. Going to bed at 4 am – not so conducive.  So Rocker Dude plans on being up all night, and he needs good food to keep him going – so, cheesecake!!!

All done!
All done!

Squeaker is squeaking, so I have to run.  Here is the recipe.

Recipe (from Smitten Kitchen):

Brownie batter
1 stick (1/2 cup or 4 ounces) unsalted butter, cut into pieces
3 ounces unsweetened chocolate, chopped
1 cup sugar
2 large eggs
1/2 teaspoon pure vanilla extract
2/3 cup all-purpose flour

Cheesecake batter
8 ounces cream cheese, well softened (or equivalent amount of white cheese – gevina levana)
1/3 cup sugar
1 large egg yolk
1/4 teaspoon pure vanilla extract

1/2 cup semisweet chocolate chips

Put oven rack in middle position and preheat oven to 325°F. Butter an 8-inch square baking pan. Heat butter and chocolate in a heavy saucepan over moderately low heat, whisking occasionally, just until melted. Remove from heat and whisk in sugar, eggs, vanilla, and a pinch of salt until well combined. Whisk in flour until just combined and spread in baking pan.

Whisk together cheesecake batter ingredients in a small bowl until smooth. Dollop over brownie batter, then swirl in with a knife or spatula.

(You can use a butter knife because the tip of it is round enough that you can use it to fold bits of the brownie batter over the cheesecake batter for a more visibly marbled effect.)

Sprinkle chocolate chips over cheesecake/brownie batter swirl.

Bake until edges are slightly puffed and center is just set, about 35 minutes. Serve warm or at room temperature.

Caramel Cheesecake with Brown Sugar Crust – Bring on the Dairy!

Hello everyone.  Here we are two days before Shavuot – the holiday during which we eat tons and tons of dairy to make up for all the other holidays in which we eat meat. Rocker Dude, being of a lactose intolerant nature, does not enjoy this holiday as much as other people, and this year, due to Squeaker’s sensitivities, I will be joining him in the non-dairy consuming club. But don’t worry, to make up for this, when I do stop nursing her, we will have a make-up Shavuot filled with all sorts of dairy delicacies.

In any case, at this time of year, the interwebs are filled with tons of cheesecake recipes of all varieties.  As we were having a cheesecake celebration at work, I wanted to make something different, something new. I spent a morning exploring options for possible flavorings, and settled on two options – something caramely or a brownie cheesecake. I knew that I would only have a few hours to make the cake on Saturday night as I did not want to stay up past midnight, so I decided to go with the caramel cheesecake for work.

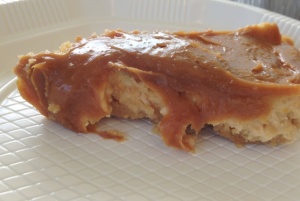
Caramel cheesecake with caramel goodness all over.

I bounced around possible versions in my head for a few days and finally on Saturday I finalized how I would go about making it. I had bought dulce de leche to mix into the cheese, but then I read on the container that it is not suitable for cooking in high temperatures, so I freaked. What was I supposed to do now??? Do I just make a standard cheesecake and put the dulce de leche on top? Do I scrap the idea completely? Major dilemma.

I wanted to get the caramel flavor into the cake itself, so in the end, as I was measuring the sugar to mix into the batter, I decided to caramelize it first. I threw the whole cup and a half straight into a pot and set it on the fire.  I knew that it would be hard when it cooled, but that I could probably use the cheese to smooth the caramel out.  When the caramel was ready, I put in half of the cheese because I didn’t want the consistency to change too much. After much stirring, the caramel smoothed out and became usable in the cheesecake. I mixed it with the rest of the ingredients and into the oven it went.

The whole cake. (Sorry for the poor photography, I did not have fancy dishes at work to really show this cake off).

My one issue with this whole affair was that I would not be able to taste the cheesecake when it was done – how would I know if it even tasted good?? Well, we put our faith in God.

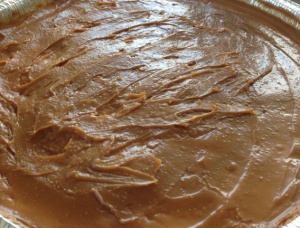
When the cheesecake cooled, I spread the dulce de leche on top so that this cake would have a double whammy of caramel flavor.

Caramel Cheesecake with Brown Sugar Crust

I brought the cake to work the next day and let me just say, God delivered.  It was a hit all around, the consistency was perfect, and the caramel flavor was there. I even snuck a bite (hope it doesn’t come back to bite me later when Squeaker wakes up crying at night because her tummy hurts), and it was delicious.

Shavuot cheesecake spectacular

If you need a cheesecake pick-me-up – here you go. Also, just because I am curious, do you say car-a-mel or car-mel?

Recipe:

Crust:
50 g tea biscuits, crushed into fine crumbs
50 g butter or margarine, melted
1 tbsp. brown sugar

Cake:750 g white cheese (gevina levana) 5%, or equivalent amount of cream cheese
5 eggs
3/4 cups flour
1 1/2 cups sugar
1 tsp. vanilla

400 g dulce de leche

Preheat oven to 150 degrees C/320 degrees F. Combine all the ingredients for the crust and press into the bottom of a 9 inch springform pan, or a 9×13 rectangular pan (the crust will just be a tad thinner). Bake the crust for ten minutes until it is lightly browned.

Place the sugar in a pot over medium-low heat. Without stirring, let the sugar heat up until it dissolves. You can use a wet pastry brush to wash down the sides of the pot from any sugar crystals that might creep up. When the sugar starts browning, take it off the fire to ensure that it doesn’t get too dark.  It should stay a light amber color. The sugar will still cook after it is removed from the fire. Once you have reached the desired caramel color, add half of the cheese to the pot.  The caramel will seize up and bubble, but keep stirring the mixture over the medium-low heat, and it will soften and mix into the cheese. Set aside to cool (or refrigerate for 10 minutes or so.

In a bowl, mix up the rest of the ingredients, being careful to not incorporate too much air.  Add the caramel mixture and mix well.  Bang the bowl firmly on the table or counter to pop any air bubbles that might have gotten in. Gently pour the batter over the crust and place the pan in the oven. Because I usually cook my cheesecakes in my toaster oven I don’t have space for a water bath, so I just undercook the cake slightly – it should still be jiggly in the middle, and usually that is enough to prevent cracking. Also, covering the cake with a topping helps.

When the cake is completely cool, spread the dulce de leche over the top of the cake. Slice and serve!

You can also melt some chocolate with some heavy cream and drizzle it on top of the cake and that would be delicious too.  I just didn’t have time for it.